The Configuration Settings page is the core of your web site's configuration.
Numerous configuration options are contained on this one page. Keep in mind this is also a global
configuration page. Since this configuration is global, you only have to set it once,
then this configuration is applied to all of your web pages. Like the Header Page configuration,
this makes it easier to keep the look and feel consistent for every page on your site.
The following will walk you through all the different sections.
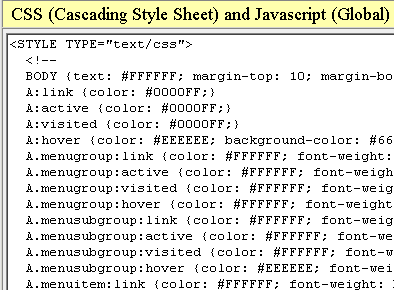
CSS (Cascading Style Sheet) and Javascript
This box allows you to create a global Cascading Style Sheet. You may also use Javascript.
Like everything else on this page, this section is global. By default, we have a pre-made
style sheet and a little Javascript for you to use. You can make changes as you see fit, or you
can remove all of it.
Information regarding the use of CSS and Javascript is not covered here. If you need help with
these topics please view our tutorials on those subjects.
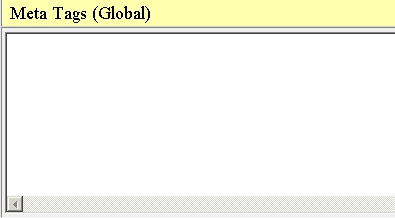
Meta Tags
This box allows you to enter Meta Tags for your web site. Meta Tags are information inserted into
the "head" area of your web pages. These are not seen by your visitors but instead are used
to communicate information to other sources. Meta tags can be used to tell the visitors
browser what character set you are using. They can also be used, to some degree, to describe
the content on your pages to a search engine. The meta tags used here will be applied to all
of your web pages.
Pixel Width
This section controls the pixel width for different areas of your web site. A pixel is a unit
of measurement used on computer monitors and TVs(as well as others). There are 72 pixels in
1 inch. The following widths can be set:
-
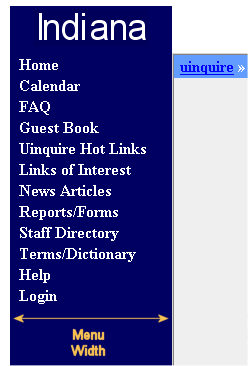
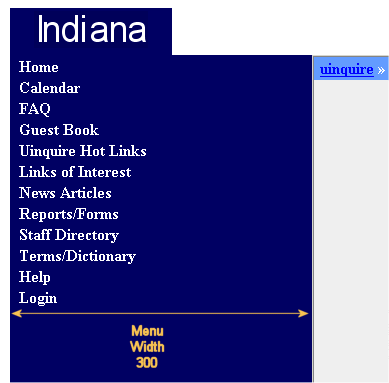
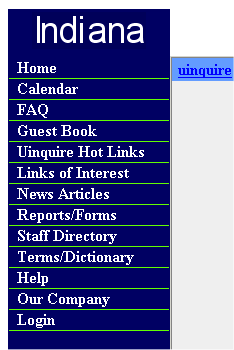
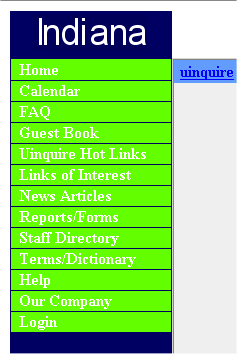
Menu: This is the width of your menu. The value must be between 50 and 300 pixels. Here are
2 examples of different sizes to give you a better feel for what this setting does.
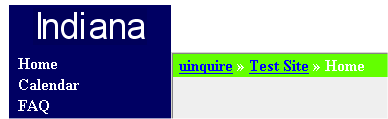
Menu Width of 160
 |
Menu Width of 300
 |
-
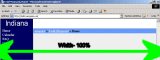
Web site: This is the overall width of your web site. There are 2 ways to set this
option. You may either choose 100%, or you may choose a pixel value between 500 and 1600. Most of
the time you will want to choose 100%. Here are 2 examples that will show you the differences in these
settings.
Web site Width of 100%
 |
Web site Width of 550 Pixels
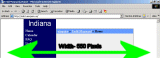 |
Notice in the second image with a width of 550 pixels how everything is only 550 pixels wide within
the browser. Everything else is dead space that cannot be used.
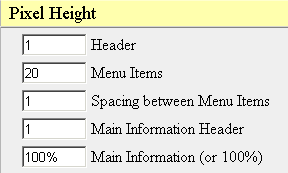
Pixel Height
This section controls the pixel height for various items. It works the same as pixel width but you can set the height, in pixels, for
your Header, Menu Items, Spacing between Menu Items, Main Information Header, and Main Information. Here are examples
of each height setting:
 |
-
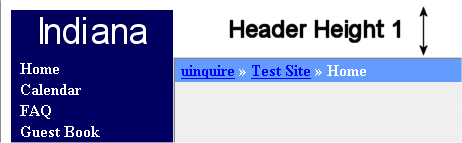
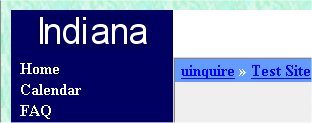
Header: This sets the height, in pixels, of your header. The most important thing to note here
is that this height is not 100% guaranteed. As an example, lets say your have a company logo that is 100 pixels
high. Here you set your Header height to be 50 pixels high. The end result is that your header height
is going to conform to your picture, making it at least 100 pixels high. If your company logo happened to be 10
pixels high, your Header height of 50 would hold true. Here is a screen shot that shows what this setting does.
Header Height 1 Pixel
 |
Header Height 150 Pixels
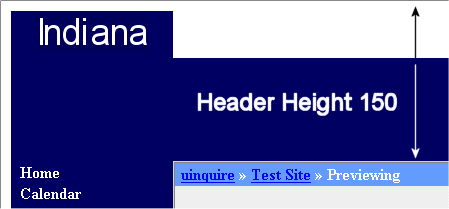 |
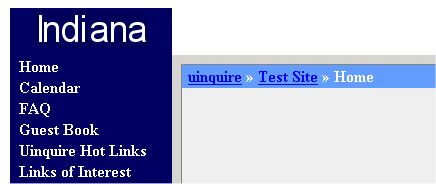
Notice in the first example the pixel height is set to 1 pixel. My Indiana header image is larger than 1 pixel. The end
result is that my header is larger than 1 pixel because my image expanded it. In the second example, my pixel width was
set to 150 pixels. My Indiana image is smaller than 150 pixels high so my reservation of 150 was granted.
-
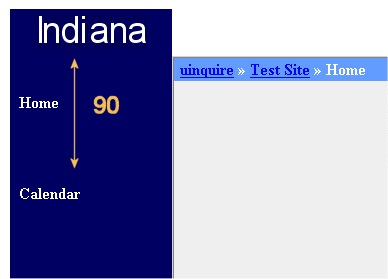
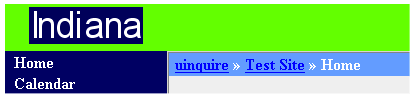
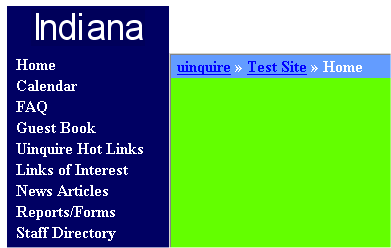
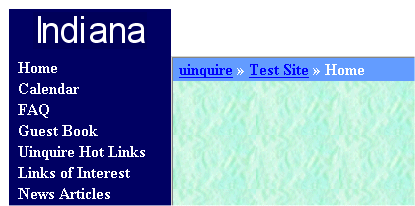
Menu Items: This height refers to the height of all your menu items. It is best shown by example.
Menu Item- 20 Pixels
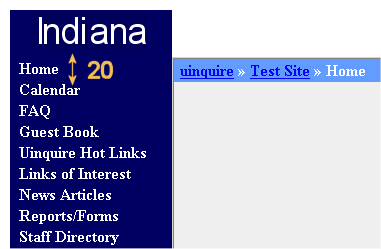 |
Menu Item- 90 Pixels
 |
-
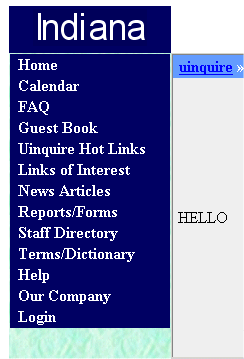
Spacing between Menu Items: This refers to the space between menu items. Do not confuse this with the
height of the Menu Items as shown above. The Menu Item height is the height of the actual menu item itself. The spacing
between Menu Items is the space between each item. Here is an example.
Menu Spacing- 20
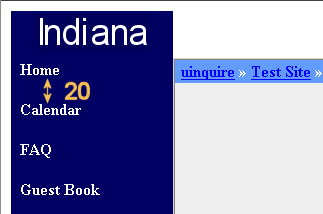 |
-
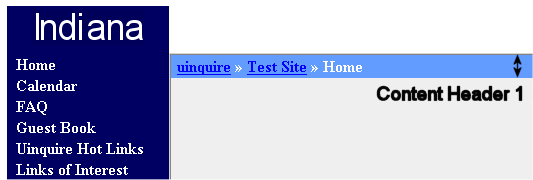
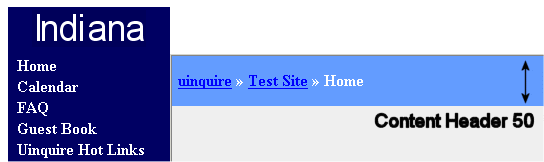
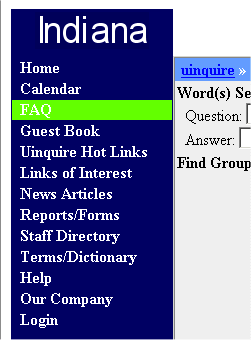
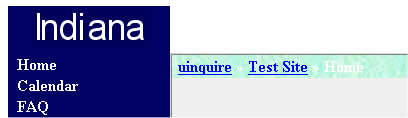
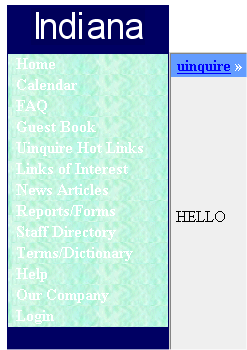
Main Information Header: The Main Information Header is the header that resides above Main Information. Pages such as FAQs,
news, Reports, etc, all have Main Information Headers. Here are 2 examples.
Main Information Header 1 Pixel
 |
Main Information Header 50 Pixels
 |
-
Main Information: This option sets the height for the Main Information. Main Information is your
page content. Most people will want to leave this at 100%. The height can be specified in either pixel form or it can be 100%.
Borders
This section enables you to display borders around different sections of your site.
The HEADER, MENU, and MAIN INFORMATION sections are all contained in a tables. This turns
on the border for them. You will most likely want to keep the number small and each has a maximum of 9. If you decide to
turn on a border, I suggest you start with 1, then go up from there until you get it right. If you do not want a border, set
it to 0. The fist box (Around all) sets a border for all 3 sections (HEADER, MENU, and MAIN
INFORMATION). The following outlines what each section consists of.
-
Header: This sets the border around your entire header. Here is part of an example with the Header
border set to 9.
Header Border- 9
 |
-
Menu: This sets the border around your Menu Items. Here is an example with the border set to 9.
Menu Border- 9
 |
-
Main Information: This sets the border around the main content of the page. This is best shown with a
screen capture.
Main Information Border- 9
 |
-
Around All: The first option, Around All, sets the border for all of the items listed above. This is the
easiest method to use if you want to set all items to the same border.
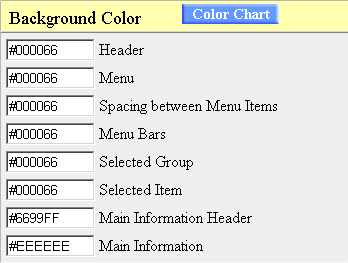
Background Colors
This section lets you set the background colors of your web site. The colors need to be specified
with their corresponding "hex code". Your web browser understands how to read these "hex codes"
and is a standard part of HTML. At the right of the Background Color header you will see a button
labeled Color Codes. When you click on it, a new window will pop up with
a chart with 216 different colors to choose from. The following is a list of what can be set. Screen captures
are provided when necessary.
Background Colors
 |
-
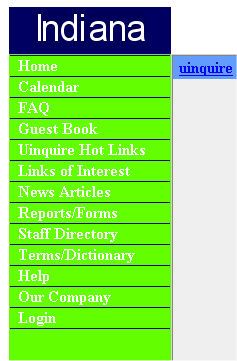
Header: This sets the background color of your page header.
Header- Green
 |
-
Menu: This sets the color of your menu.
Menu- Green
 |
-
Spacing between Menu Items: This sets the background color for the spacing between menu items.
Spacing between Menu Items- Green
 |
-
Menu Bars: This is the color of your Menu Bars.
Menu Bars- Green
 |
-
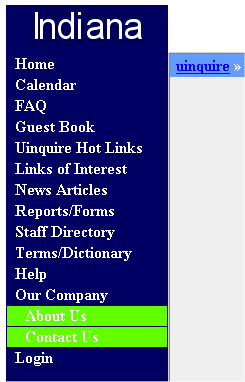
Selected Group: This sets the color of your sub menus. Sub menus are menus within menus. In
the following example, the Menu Item "Our Company" has 2 sub menus which are "About Us" and "Contact Us."
Selected Group- Green
 |
-
Selected Item: When you click on a menu item, it stays highlighted. This is the color of that highlight.
Selected Item- Green
 |
-
Main Information Header: This sets the color of the Main Information Header.
Menu Header- Green
 |
-
Main Information: This sets the background color of your page content (Main Information).
Main Information- Green
 |
Upload Images
This section deals with background images. You may upload background images
for several aspects of your site. The following background images are allowed:
Upload Images
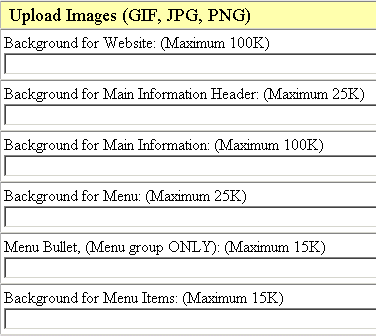 |
-
Background for Web site:
This box lets you upload a background image that will show for your entire
web site.
Background for Web site- Green
 |
-
Background for Main Information Header:
This sets a background image for the Main Information Header.
Background for Main Information Header- Green
 |
-
Background for Main Information:
This box lets you upload a background image for your Main Information section.
Background for Main Information- Green
 |
-
Background for Menu
This box lets you upload a background image for your menu.
To upload an image simply click on the "Browse" button and locate the
image. Once you do this you will see the image name(including full path on your
hard drive).
Background for Menu- Green
 |
-
Menu Bullet, (Menu group ONLY): This allows you to use small images in front
of your Menu Items. These are called Bullets.
Menu Bullet
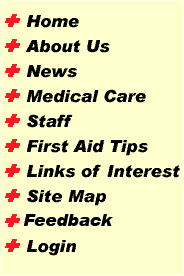 |
-
Background for Menu Items: This allows you to use a background image for your
individual Menu Items.
Background for Menu Items- Green
 |
Finally, when you are done you need to click the SAVE button at the bottom of the page.
 Member Administration
 Reference Guides
 Tutorials
 HTML
HTML CSS
CSS Javascript
 FAQ
FAQ