This section allows you to create users who can login to your site, just as you do.
When you add a user, you grant them access to specific parts of the site. You may
grant users access to the entire site, or just part of the site. The option is yours.
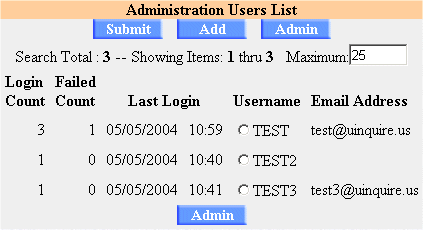
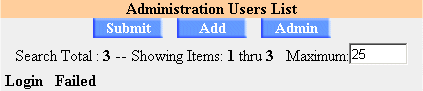
Users List
Your users list will show you many things. The following information is available
for each user:
- Login Count: The number of times the user logged in.
- Failed Count: The number of times the user failed to login.
- Last Login: The last time the user logged in.
- Username: The username of the user.
- E-mail Address: The e-mail address of the user.
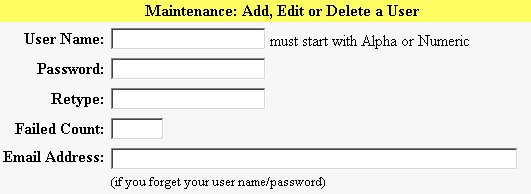
Adding a User
To add a user you need to click the "Add" button at the top of the page.
General Information
When the "Add" page comes up, you will need to enter in the following information:
-
User Name: The user name is case insensitive. The user TEST is the same as user test.
The User Name must also start with either a Alpha or Numeric character.
-
Password: Enter in the password here. You must verify the password by retyping it in the
box below it labeled "Retype."
-
E-mail Address: Enter in the users e-mail address here. This field is not required however it
is helpful to provide it. If a user forgets their password, they can have it e-mailed to them via
the login page. If you do not specify one, they will not be able to make the password request. They
will instead have to contact you to have it reset.
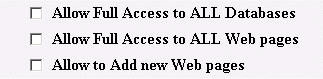
Access Privileges
After you enter in general information about the user, you need to decide what type of access to grant
them. There are 2 sections that allow you to grant privileges. The first section deals with FULL access.
The second section enables you to allow/disallow access to certain sections manually.
FULL Access
This is the section that allows you to grant FULL access to certain sections. A description of what each
item represents follows.
- Allow Full Access to ALL Databases: This grants FULL access to everything under Current Databases.
- Allow Full Access to ALL Web pages: This grants FULL access to everything under Current Web Pages.
- Allow to Add new Web pages: This allows users access to create web pages. Note this does not give
a user permission to change an existing web page. It only allows them to create a web page, then maintain it.
Allow/Disallow Manually
The second method involves allowing/disallowing privileges manually. What determines whether the option is allowed or
disallowed is the FULL access section outlined above. For example, if you have Allow Full Access to ALL Databases
checked, anything checked under Current Databases is disallowed. The following is an outline of all the options.
-
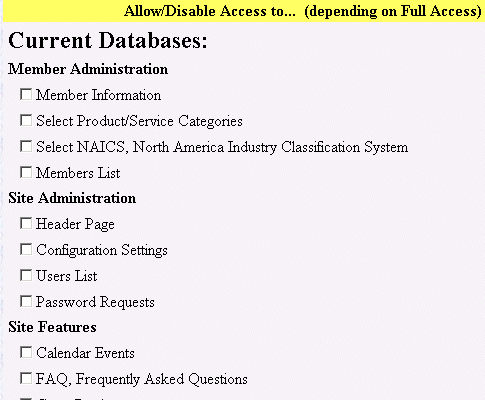
Current Databases: The items under this section are governed by the FULL access option Allow Full Access to ALL Databases.
If Allow Full Access to ALL Databases IS NOT checked, anything checked under Current Databases will be allowed. If
Allow Full Access to ALL Databases IS checked, anything checked under Current Databases will be disabled.
-
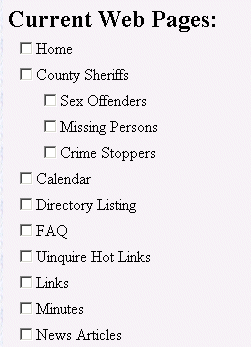
Current Web Pages: The items under this section are governed by the FULL access option Allow Full Access to ALL Web pages.
If Allow Full Access to ALL Web pages IS NOT checked, anything checked under Current Web Pages will be allowed. If
Allow Full Access to ALL Web pages IS checked, anything checked under Current Web Pages will be disabled.
Deleting a User
Deleting a user is very simple. When you are in the users profile, you need to scroll to the bottom to the page. Here you will see
the SAVE, BACK, ADMIN, and DELETE buttons.
You need to place a check mark in the box labeled "You MUST check this box first to Delete this User." Once you do this you simply
need to click the DELETE button. The user is now deleted.
When you are finished, you need to click the save button. You may make changes as necessary to a users profile
at any time. This includes the password.
 Member Administration
 Reference Guides
 Tutorials
 HTML
HTML CSS
CSS Javascript
 FAQ
FAQ